Painting Roses with Loose, Expressive Brushwork: A Comprehensive Guide
Painting roses can seem intimidating with their intricate layers of petals, but by focusing on the essential elements of shape, value, and color harmony, you can create beautiful, lively floral paintings without getting bogged down in details. This approach emphasizes bold brushwork and thoughtful color choices to capture the essence of roses rather than rendering them photorealistically. The key is to work quickly and intuitively, building up layers of transparent and opaque paint to create depth and luminosity while maintaining a fresh, painterly quality.
Preparing Your Workspace and Materials
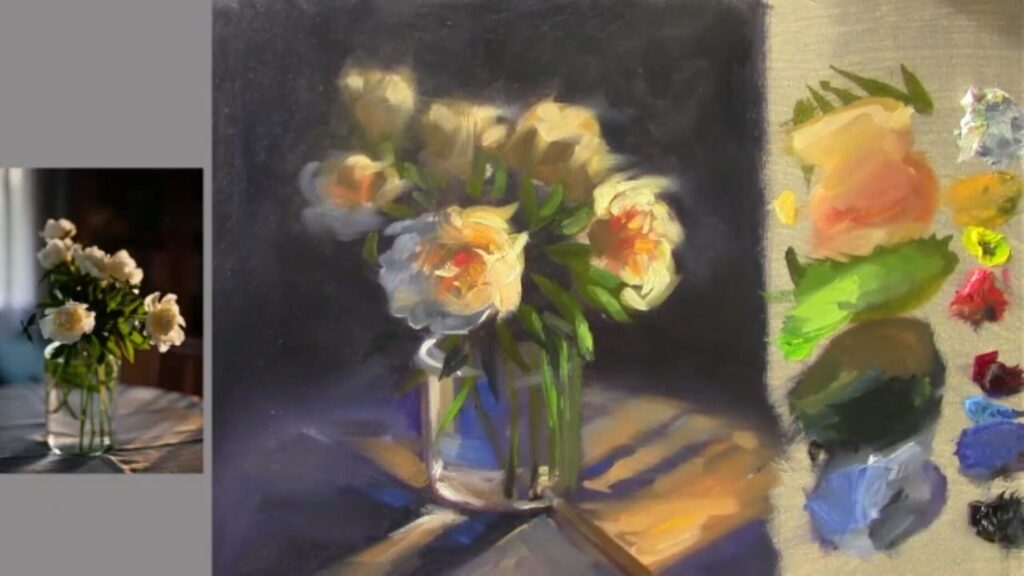
Before beginning, gather your materials thoughtfully. A limited palette of just six colors—Titanium White, Cadmium Yellow, Cadmium Red Hue, Permanent Alizarin Crimson, Ultramarine Blue, and Ivory Black—will provide all the mixing possibilities you need for vibrant roses. Choose a medium-sized canvas (8×10 inches works well) and have both flat and round brushes ready. The flat brush will help block in large areas efficiently, while a small round brush is perfect for adding delicate details and stems later. Set up your workspace with good lighting and position your reference photo where you can see it clearly. Many artists find it helpful to do a quick thumbnail sketch beforehand to plan the composition, noting where the lightest lights and darkest darks will fall.
Creating the Initial Sketch
Begin by lightly sketching the roses with willow charcoal, which can be easily adjusted or wiped away. Focus on capturing the overall gesture and placement of the blooms rather than outlining every petal. Look for the basic shapes that make up each rose—some petals form triangles, others soft curves. Pay particular attention to the negative spaces between petals and stems, as these shapes will help you maintain accurate proportions. Don’t worry about making the sketch perfect; this is just a roadmap for your painting. If working from a reference photo, feel free to adjust elements for better composition, such as varying the sizes of roses or altering their placement to avoid monotony.
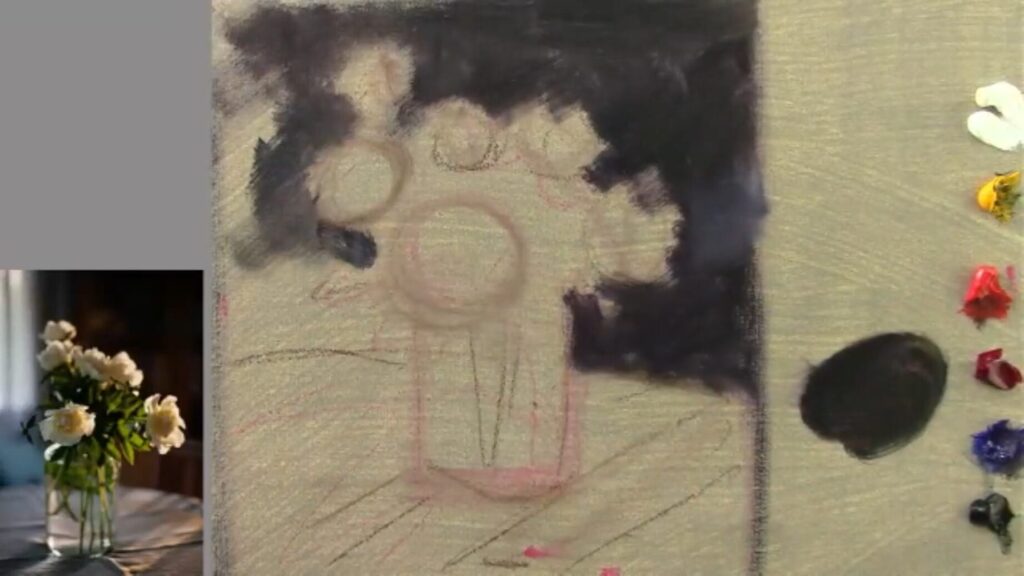
Blocking in the Background
A dark, muted background will make your roses stand out vibrantly. Mix Ultramarine Blue with Permanent Alizarin Crimson and a touch of Ivory Black to create a deep purple-gray. Apply this thinly across the background using medium-sized brushstrokes, painting around the roses but not worrying about perfect edges yet. This first layer should be transparent (“lean”) to allow for easier adjustments later. As you work, notice how the background color interacts with the edges of the petals—some areas should have soft, blended transitions where petals recede into shadow, while others can remain sharper where petals catch the light.
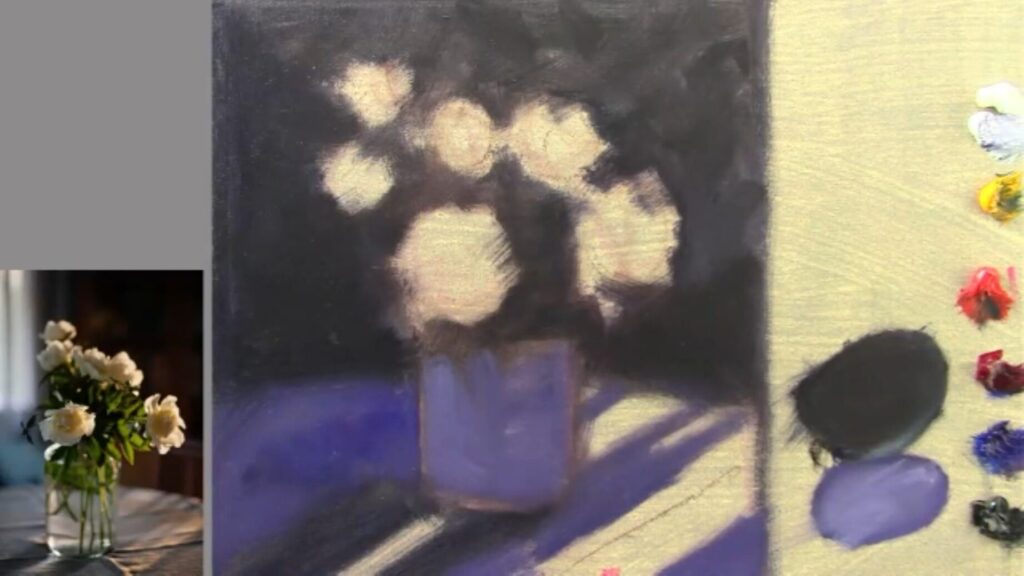
Establishing Values and Base Colors
With the background set, focus on the roses themselves. Start with the shadow areas, mixing a warm dark from Ultramarine Blue, Alizarin Crimson, and a bit of black. Apply this in the deepest crevices between petals to establish form. Next, block in the midtones using Cadmium Yellow with a touch of Raw Umber to slightly mute the intensity. Reserve pure white mixed with Cadmium Yellow for only the brightest highlights where light directly hits the petals. Remember that shadows often contain reflected color—consider adding hints of purple or blue to suggest ambient light bouncing into the darker areas.
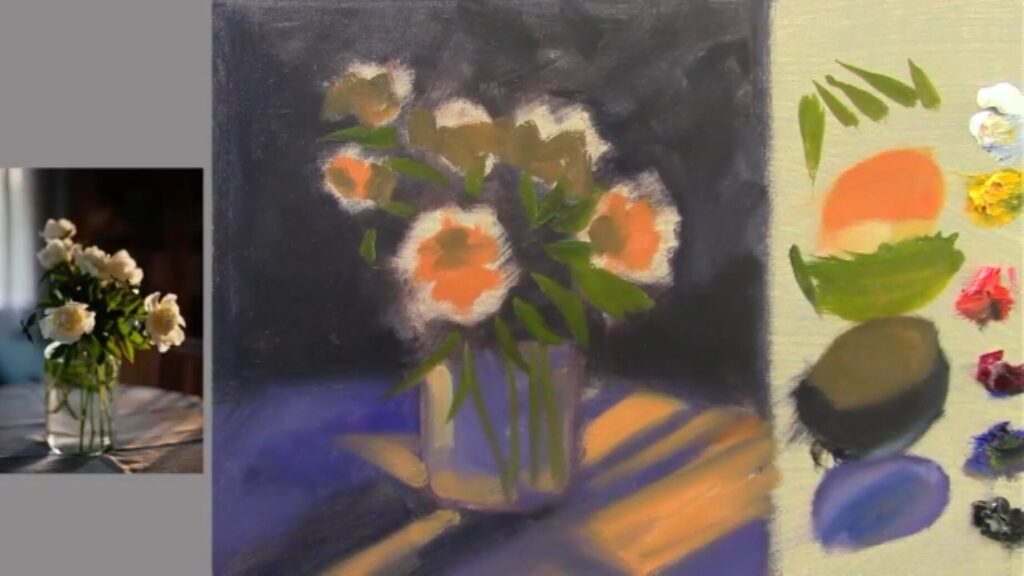
Developing Color and Texture
Now begin enhancing the color variation. In the centers of the roses, add small accents of Cadmium Red or Orange to create warmth and depth. For petals in shadow, introduce cool tones by mixing a small amount of Ultramarine Blue into your midtone yellow. Use a round brush to paint leaves with quick, confident strokes—press firmly at the base of each leaf and lift to a point at the tip to mimic their natural shape. Don’t blend everything perfectly; allowing some brushstrokes to remain visible adds energy and movement to your painting.
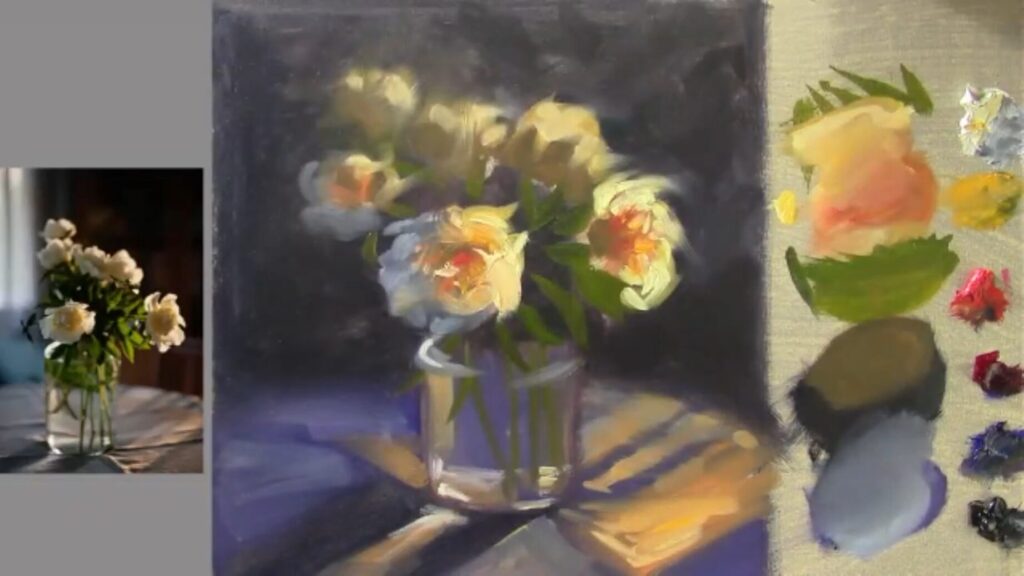
Refining Edges and Adding Final Details
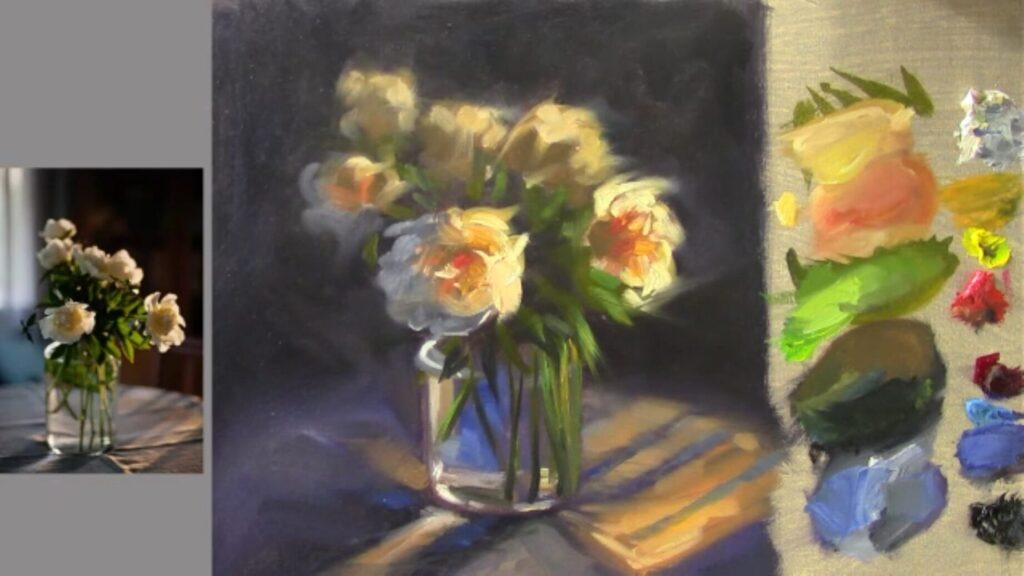
As you near completion, evaluate your edges. Soften some by lightly blending with a clean, dry brush, especially where petals curve away from the light. Keep a few sharp edges on petals in the foreground to create focus. Add final touches like delicate veins on petals using a rigger brush with a cool gray mixture, and place tiny highlights with thick, impasto strokes of Titanium White where light catches the edges of petals. Remember to step back frequently to assess the overall balance of warm and cool tones, making adjustments as needed.
Conclusion: Embracing the Process
This approach to painting roses emphasizes observation and bold color choices over meticulous detail. By working quickly and focusing on value contrasts first, you create a strong foundation, then build up color and texture expressively. Don’t be afraid to make changes—scraping back areas or glazing over them with transparent color can yield beautiful effects. Most importantly, enjoy the process; the freshness and energy of your brushwork will bring your roses to life in a way that tight rendering never could. With practice, you’ll develop an intuitive feel for when to add detail and when to leave areas suggestively unfinished, resulting in paintings that feel both lively and harmonious.
Support my Art Journey At not cost to you buying Art materials You use from my Amazon Store: https://www.amazon.com/shop/rensoart