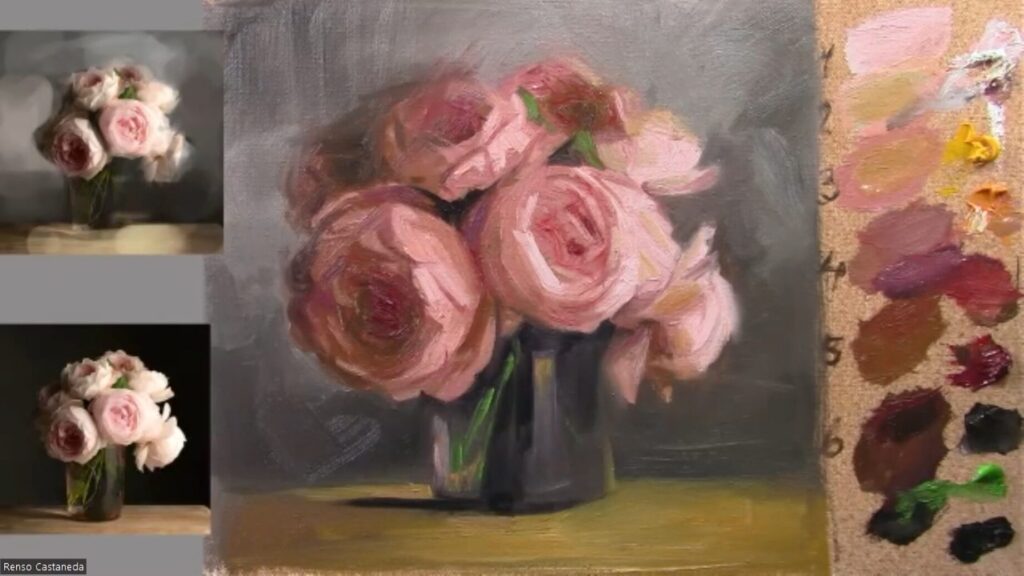
How to Paint Flowers with Oils
This video is from my Patreon Live paint along clases
How to Paint Flowers with Oils: A Step-by-Step Guide for Beginners
Flowers have long been a favorite subject for artists, and for good reason. Their delicate petals, vibrant colors, and intricate details make them a joy to paint. Oil painting, with its rich textures and blendable colors, is an ideal medium for capturing the beauty of flowers. Whether you’re a beginner or an experienced artist looking to refine your skills, this step-by-step guide will help you create stunning floral oil paintings.
Why Paint Flowers with Oils?
Oil paints are perfect for floral art because of their versatility and depth. They allow you to layer colors, create soft transitions, and achieve a luminous quality that mimics the natural beauty of flowers. The slow drying time of oils also gives you the flexibility to work on details and make adjustments as you go.
Materials You’ll Need
Before you start, gather the following supplies:
- Oil paints: A basic palette of colors like titanium white, cadmium yellow, alizarin crimson, ultramarine blue, sap green, and burnt umber.
- Brushes: A variety of sizes and shapes, including round, flat, and filbert brushes.
- Canvas or painting surface: Pre-primed canvas or canvas board works well.
- Palette: For mixing colors.
- Mediums: Linseed oil or odorless mineral spirits to thin the paint.
- Easel: To hold your canvas at a comfortable angle.
- Paper towels or rags: For cleaning brushes and correcting mistakes.
Step 1: Choose Your Flower and Composition
Start by selecting a flower or bouquet that inspires you. You can work from life, a photograph, or even your imagination. Consider the composition—how the flowers will be arranged on the canvas. Think about balance, focal points, and negative space. Sketch a rough outline of your composition lightly with a pencil or thin paint.
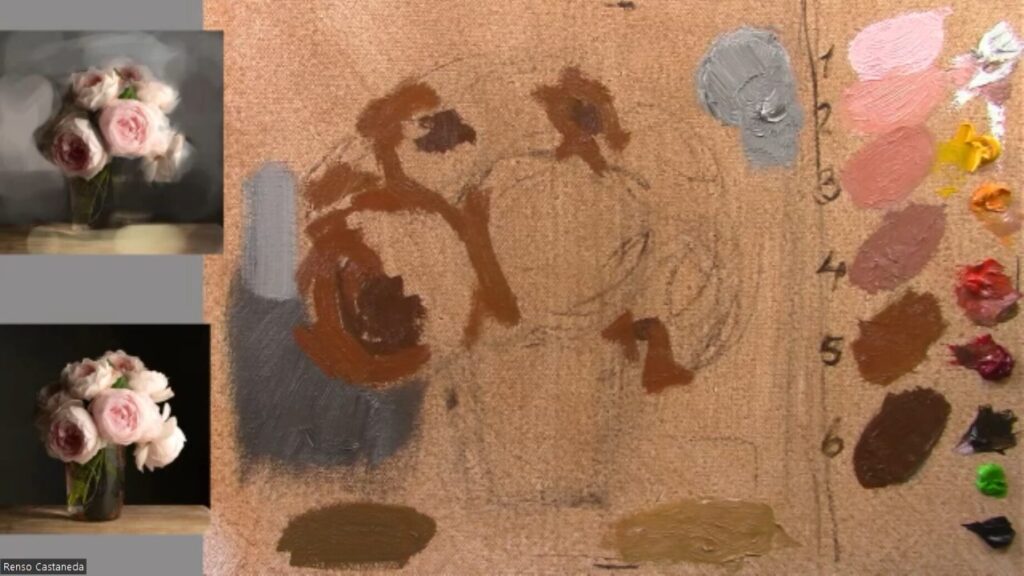
Step 2: Block in the Background
Begin by painting the background. This helps establish the tone and contrast for your flowers. Use broad strokes and keep the background simple so it doesn’t distract from the main subject. For a natural look, blend colors softly and avoid harsh lines.
Step 3: Paint the Basic Shapes
Using a large brush, block in the basic shapes of the flowers and leaves. Focus on the overall form rather than details at this stage. Use lighter colors for the petals and darker tones for the shadows. Don’t worry about perfection—this step is about laying the foundation.
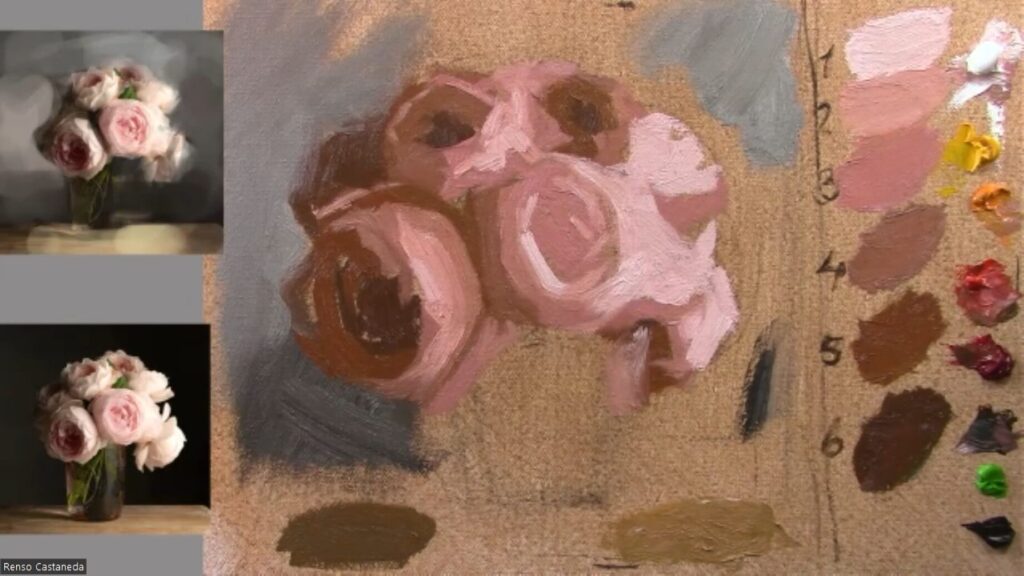
Step 4: Add Layers and Depth
Oil painting is all about building layers. Once the initial layer is dry (or tacky), start adding more detail and depth. Use mid-tones to define the petals and leaves, and gradually introduce highlights and shadows. Pay attention to the light source to create a realistic sense of dimension.
- Highlights: Use lighter shades to emphasize areas where light hits the petals.
- Shadows: Add depth with darker tones in areas where light doesn’t reach.
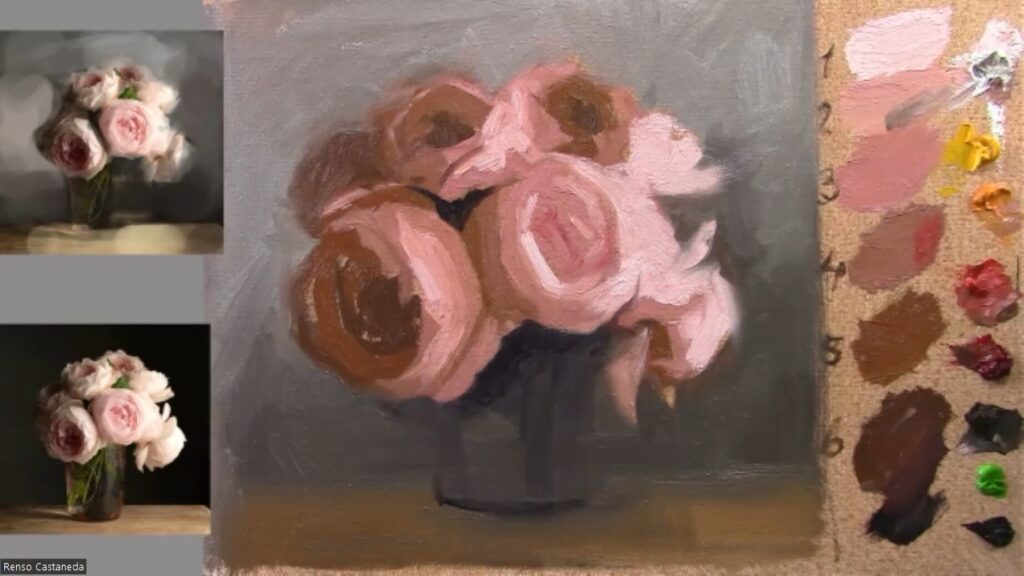
Step 5: Refine the Details
Now it’s time to focus on the finer details. Use smaller brushes to add texture, veins on the leaves, and intricate patterns on the petals. Don’t overdo it—sometimes less is more. Keep stepping back to view your painting from a distance to ensure it looks balanced.
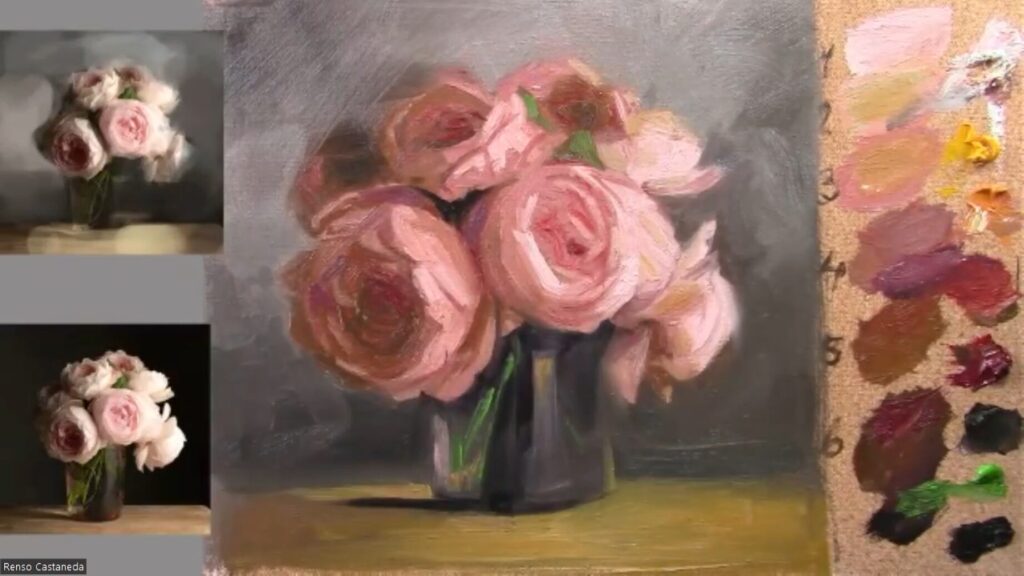
Step 6: Add Final Touches
Once you’re happy with the details, add any final touches to enhance the painting. This could include adjusting the contrast, softening edges, or adding subtle highlights to make the flowers pop. Take your time and trust your instincts.
Tips for Painting Realistic Flowers
- Observe Real Flowers: Study how light interacts with petals and leaves. Notice the subtle color variations and textures.
- Use a Limited Palette: Start with a few colors and mix your own shades. This creates harmony in your painting.
- Work from Dark to Light: Build up the darker tones first, then add lighter layers for highlights.
- Experiment with Brushstrokes: Use different brush techniques to create texture and movement. For example, use short, quick strokes for petals and long, smooth strokes for stems.
- Be Patient: Oil painting takes time, especially with layers. Allow each layer to dry before adding the next.
Common Mistakes to Avoid
- Overworking the Painting: Sometimes less is more. Know when to stop to avoid muddy colors.
- Ignoring the Background: A well-painted background can enhance the flowers, while a neglected one can detract from the overall piece.
- Rushing the Process: Oil painting requires patience. Take your time to build layers and refine details.
Inspiration and Practice
The more you paint, the better you’ll become. Experiment with different types of flowers, colors, and compositions. Study the works of master floral artists like Georgia O’Keeffe or Claude Monet for inspiration. Remember, every painting is a learning experience.
Conclusion
Painting flowers with oils is a rewarding and meditative process that allows you to connect with nature and express your creativity. With the right materials, techniques, and a bit of patience, you can create stunning floral artworks that capture the delicate beauty of your subject. So grab your brushes, set up your palette, and let the beauty of flowers inspire your next masterpiece!
Support my Art Journey At not cost to you buying Art materials from my Amazon Store: https://www.amazon.com/shop/rensoart